Here is a short guide on how to treat and maintain the Compacttilt product.
Lubrication overview
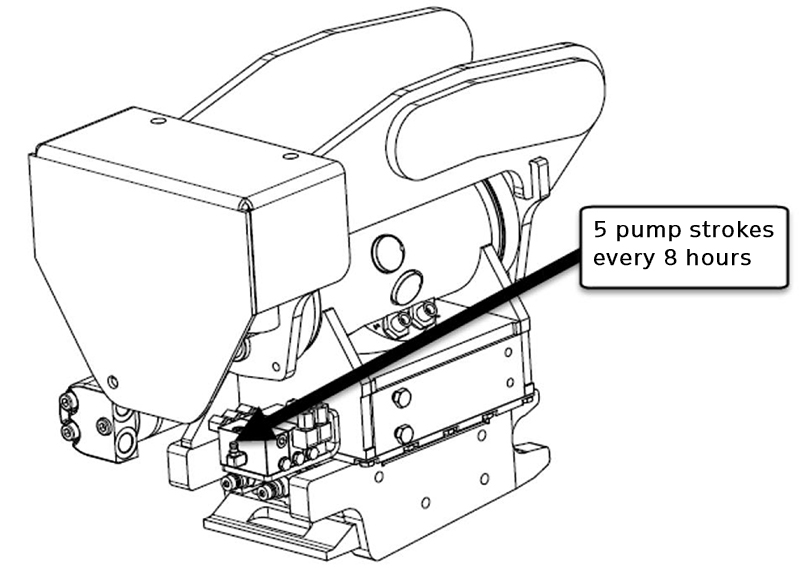
Lithium-based EP NLGI 2 grease is used to lubricate the Compacttilt product.
Grease containing graphite, molybdenum and couplings must not be used.
It is ensured that the syringe and lubrication nipples are free of dirt before lubrication is carried out.
Maintenance
During daily inspection and maintenance, check: ➢ Lubrication of lubrication points according to the overview ➢ Threads are intact ➢ Eyes and bolts are not broken ➢ No loose screw joints ➢ No cracks or fractures ➢ It is ensured that the tool holder is clean, mounted and clamped correctly ➢ Compacttilt Tiltrotator is correctly mounted between the carrier and the implement ➢ There is no hydraulic leak ➢ There is no grease leakage on hoses or in couplings
Connection of equipment
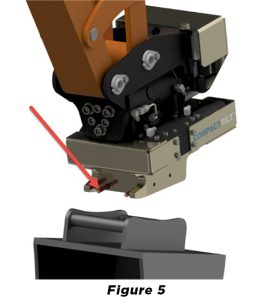
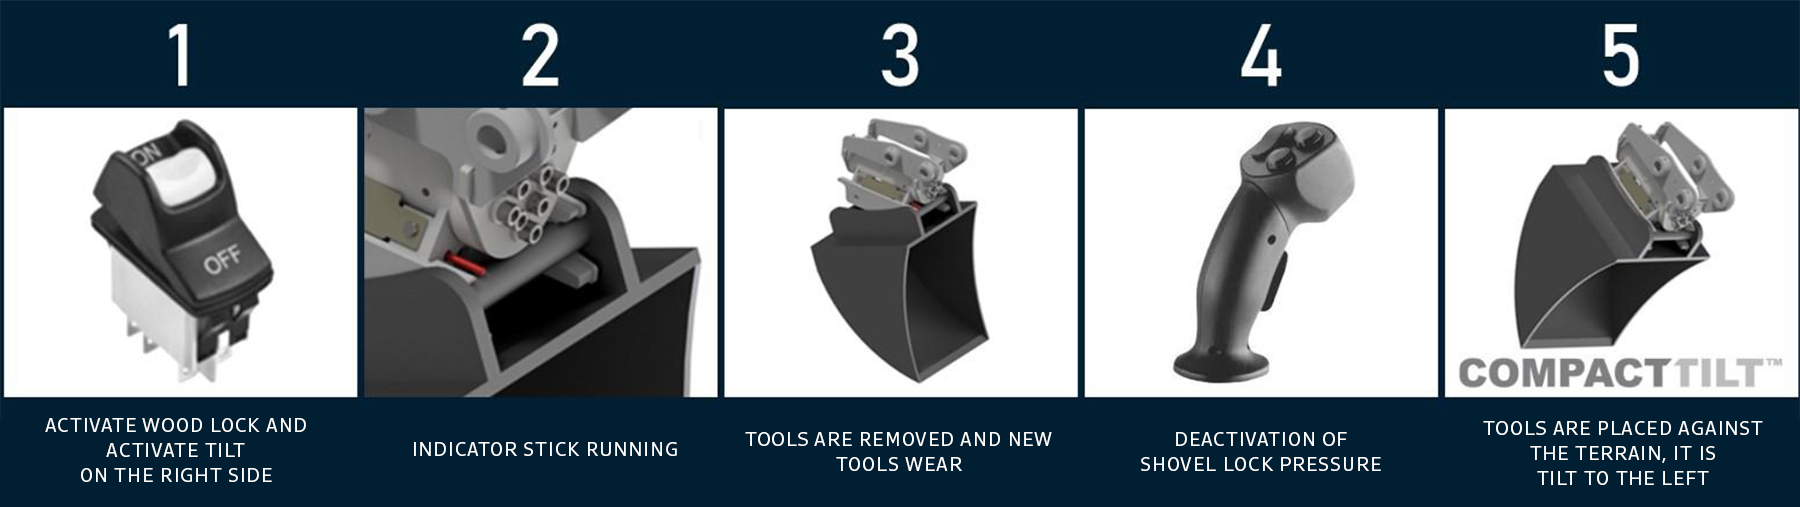
STEP 1
Before equipment is connected to the quick coupler, it must be ensured that the quick change’s locking pawls are retracted, which can be seen by the indicator stick being pushed out.
(figure 5)
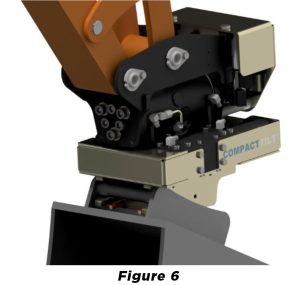
STEP 2
The equipment to be connected must be positioned so that the quick coupler fork eyes can engage.
The fork eyes of the quick coupler are brought into engagement with the coupling shaft of the equipment.
(figure 6)
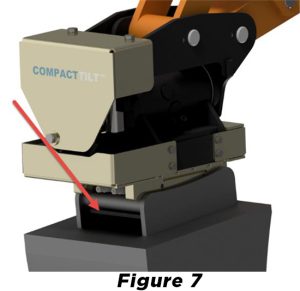
STEP 3
When the fork eyes of the quick coupler have caught on, the tool is swung into place so that it rests against the open fork eyes of the quick coupler. The quick coupler is activated and the locking pawls slide out (Figure 7).
The activation of the quick coupler can be seen by the indicator stick being lowered.
The machine is now ready for use with the connected tool.
Use of quick coupler with valve system
Control of assembly
1. Check that the Compacttilt product is working correctly. 2. Check that no hoses or anything else is exposed to pinch, cut or stretch damage. 3. Check densities. 4. Check that the bolts are properly tightened [See the carrier’s instructions]. 5. Check that there is no contact with the digging arm and the Compacttilt product at full swing. 6. Ensures that the attachment fits the carrier machine [see the machine plate]. 7. Ensures that the pin-lock has full extension and the indicator pin is correctly fitted.
NOTE: Assembly and installation may only be carried out by workshops approved by the manufacturer. No changes may be made to the assembly without the manufacturer’s permission. Workshops that are approved by the manufacturer are dealers with their own workshop, unless otherwise stated on delivery of the Compacttilt product.